

0. Prerequisites.
Make sure your preferred external edit capable text editor has been seen or booted by the RISC OS Filer.
For
compilation, your preferred C development tools must be available to the DrWimpC App Builder. This is either GCC 4, currently version
4.7.4. rel 6, or the ROOL C Tools.
The OSLib header files are required since DrWimpC library uses the same type definitions as
OSLib to avoid duplication of effort. If you want to use the OSLib functions for the C swi interface then include the OSLib library
too (ROOL C Tools only at the moment). The OSLib SetVars Obey file defines the OSLib include and library path, and so must be run
prior to using it in DrWimpC App Builder (or any other compilation).
If you want to start template edits from DrWimpC App Builder
then a template editor must have been seen by the filer. Note that the OLE protocol is used to perform the edits. If you don't
have an OLE support module on your system or your version doesn't handle the template edit, you can use the alternative !MyOLE
application and module that is supplied as an additional tool on this website.
1. Install the !SharedLibs.
2.The
!DRWDEF zip archive is split into three parts to keep the maximum upload and download zip file sizes as small as possible. All
three parts are required to run DrWimpC App Builder. The preferred install location is to install to the same directory that
contains the GCC 4 !Sharedlibs. Drag each part of !DRWDEF from the zip archive into the directory.
3. Install
!DrWimpC by dragging it from the zip archive to a suitable directory (e.g. Top level or $.Apps). Double clicking on the !DrWimpC icon
should load the DrWimpC App Builder ready to use. You should see the main application projects window at the top of the screen. You
can now create a new application, or edit an existing one.
4. Before using !DrWimpC reboot your system so that the !DrWimpC,
!DRWDEF and DRW system variables are set up correctly.
5. Additional Tools.
a. ResFind/ResConf are used
to locate an application's language resources. The
ResFind program is supplied in the !DrWimpC resources folder and called by the
!DrWimpC.!Boot and !Run files.
b. !MyOLE - an alternative OLE edit module provided in case the standard RISC OS OLESupport module is not available. To use it, drag it from the zip archive to the same directory that you copied !DRWDEF into so that it will have been seen by the Filer before it is used by the DrWimpC App Builder. !MyOLE contains sufficient functionality to start, monitor and complete the OLE template edit.
c. !StrongHelp for displaying the DrWimpC library API. The latest version (2.90) is available from this here - StrongHelp 2.90.
d. A web browser to display HTML Help files.
(2014-09-14)


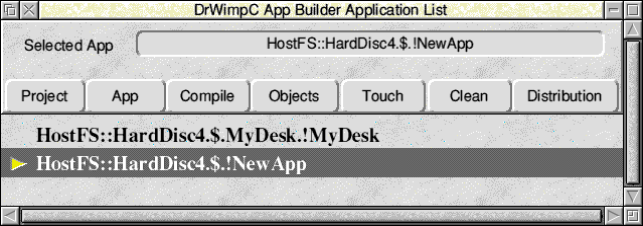
You can drag existing applications created using DrWimpC App Builder into the Applist and <SELECT> it to work on it.
The example Project Window shows two applications in the list, an existing application, the !MyDesk test application and a new application (which I happened to call !NewApp) which when created in DrWimpC App Builder becomes the currently selected application and the action menus opened by <SELECT>ing from the Project, App, Compile, etc buttons apply to it.

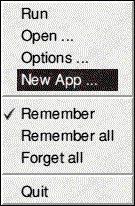
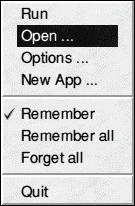
Select the 'App' item in the project window above to open the app menu, shown to the right of this text. The menu will
open directly below the 'App' icon. Select the highlighted New App ... item to open the New Application definition
box.
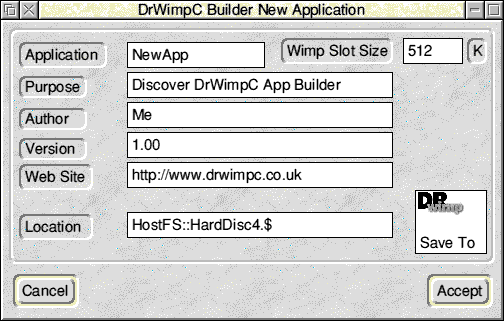
Fill in the fields and select the 'Accept' button. An example is shown below. The Application name and Location
fields are mandatory. You can automatically set the Location by dragging a directory icon from a filer window to the New Application
window, or by dragging the Save
To icon to a filer window, or to a file system icon on the icon bar.
Only the application name and location are necessary to create the new application.
A number of default files are created inside the application directory including a Resources directory containing a UK territory directory
with a default template file. and iconbar menu definition. If you want to examine the directory either <Shift> click on the
new application icon in the filer window of the location you stored the new application definition or use the 'App' menu form the
projects window 'App' item and select the 'Open ...' item.
The application's directory and file structure is the same as
the standard RISC OS application structure. You can add to it just as for any RISC OS application. Note, the Resources.UK directory
is assumed by DrWimpC to be present for certain activities,
and contains such things as a default templates file and defined menus
list.
The application is ready to be compiled. The first compilation should be done through the 'Build' item of the Compile menu which
is opened by selecting the
'Compile' icon in the projects window.
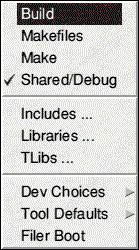
For a successful compilation the correct compile options must be selected. The default set of options is to compile for GCC 4 building
any libraries as shared, and linking with shared libraries. If you are using the ROOL C tools you must adjust these options.
In particular you should unset the Shared/Debug flag in the compile menu. It has a different meaning for GCC 4 and the ROOL tools.
For GCC 4 it indicates if DrWimpC App Builder should generate make files to build shared libraries (flag is ticked) or static
libraries (flag is unticked). For the ROOL C tools it indicates if diagnostic information should be generated during the compile
(flag ticked), or not (flag unticked) - i.e.it controls whether DrWimpC App Builder includes the -g option in the compiler flags,
and -d in the link flags when it generates the make files for the compilation.. In addition to adjusting the Shared/Debug flag for
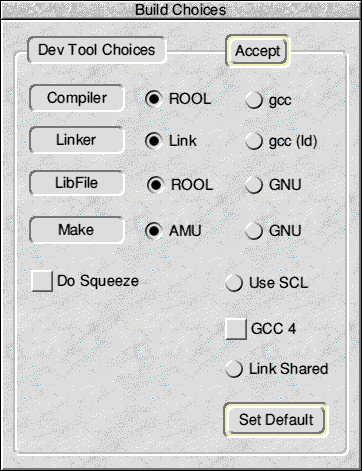
the ROOL C tools you must set the compiler to 'ROOL' in the DevOpts dialogue as shown below. The dialogue hangs off the 'Dev Choices' item
of the Compile menu - shown to the right of this text.
The separate link, make and libfile options is a throwback to GCC 3.4.6 days when I had
thoughts of mixing the use GNU make and GCC drlink with the Castle/ROOL compiler, and vice-versa. This is out of date and just selecting 'ROOL' or 'GCC' will automatically select the chosen tools make, libfile (GCC/Ar), etc tool. Although there is a GCC 4 flag, I have decided not to include support for GCC 3.4.6 after all, but I've left the flag, just in case.
The link shared flag is used to indicate whether a GCC 4 compilation should link with shared libraries if present (flag set), or force the use of static libraries (flag unset).
Setting the use SCL flag indicates that GCC should compile and link for the SharedClibrary.
After setting the build options, make sure that the relevant system variables are set up, e.g. !GCC has been double clicked for GCC
4, and the OSLib SetVars file has been run, then select 'Build' from the Compile menu. A task Obey window should open showing the
compilation's progress. When it has completed successfully you can run the application by selecting the 'Run' item of the 'App' menu.
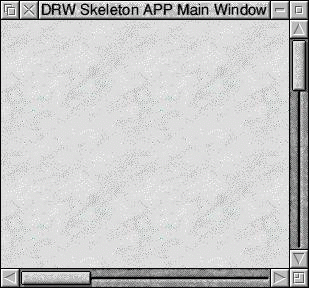
All being well, a
default main window should appear in the centre of the screen, and an iconbar icon for the new application should
be present on the iconbar. A default iconbar menu will also be created and can be opened by selecting menu while the mouse pointer
is over the iconbar icon..

