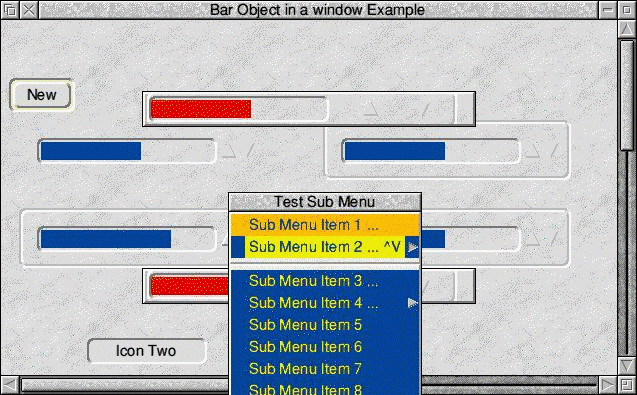

On many occasions when a button is selected your application 's response is to open a menu or another window. DrWimpC app Builder
lets you link a defined menu or a template from one of the application's template files to a template or template/icon combination
so that for windows created from the templates if the menu button is pressed while the mouse pointer is over the window/icon the linked
menu is opened automatically. At the same time your application is informed of the menu button press and so it can make adjustments
to the menu or its state before it is opened by the DrWimpC library. Similarly, if the <SELECT> or <ADJUST> button is
pressed over a window/icon with a linked window, the linked window is opened automatically. Your application is also informed so that
it can react to the window being opened.
Using the barobject window as an example, <ADJUST> clicking on the window/icon
you want the menu or template to be linked to, will open the Click Action window. The illustration shows the result of an <ADJUST>
click over the barobject group icon.
Of course if you have any template functions associated with the linked menu or template
to do with opening the linked menu or window, these will also be called automatically when DrWimpC library opens the linked menu or
window.
(2014-09-14)


You can specify a menu or template to be opened as a menu by pressing <MENU> over the Menu Name button. This will open a selector
menu that lists either the Defined Menus or the Template files (and their templates in a further sub menu). One of the menus or Template
File/Template items can be selected and linked to the template/icon combination.
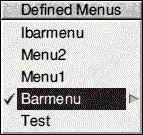
For example, to link the Barmenu (the Auto/Manual
menu that appears when <MENU> is pressed over the barobject) open the Sub Menu Types menu from the Menu Name button, follow
the Menus submenu arrow and tick the Barmenu item.
Or, to link a window created from the bartmpl/barw template to the barobject
to open when <SELECT> is pressed over the barobject, open the Click Type menu and tick the bartmpl/barw template file and template
items.
Link a Defined Menu from the menu list.
Link a Template from the Temp;late Files.



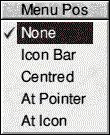
Once a menu or template has been selected a submenu arrow will appear next to its item in the menu. This leads to a sub menu where
you can select the position on the screen to open the menu or window.

Open Position Selector for a Click Action Window

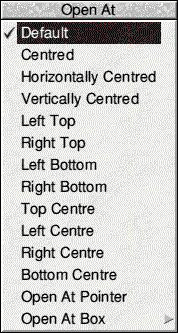

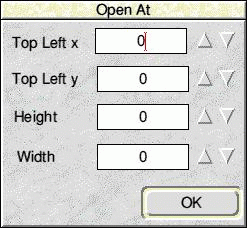
You can also specify an exact screen location for windows opened for a click action by filling in the Open At Box.
The coordinates are in OS units.
An interactive help text can be associated with a window/icon that is automatically sent to a !Help application when the
mouse pointer is over the window/icon. Alternatively, a StrongHelp page can be specified. The help text must begin
with the strong help command 'StrongHelp ' to distinguish it from plain text. E.g.for the !DrWimpC Functional API manual inside
the !DrWimpC application the command would be StrongHelp DrWimpC:Resources.UK.DrWimpCAPI drw_u_help for the English manual. Then,
when your application has the input focus in one of its windows, moving the mouse pointer over an icon or menu item that has
a StrongHelp help text command and pressing the <F1> key will open the StrongHelp help page for the drw_u_help function. Of
course you will need to have !StrongHelp installed and been seen by the Filer before any StrongHelp pages can be loaded.
You
can also combine a StrongHelp command with bubble help text by concatenating the command with the plain text using the ^ character,
for example:
StrongHelp DrWimpC:Resources.UK.DrWimpCAPI drw_u_help^Press F1 for more info
Note that the whole line of help
text must still fit into the 236 character limit of a wimp help reply message buffer, so must not exceed 235 characters.
As an alternative
to a StrongHelp page, a text file can be displayed using a second help text command - TextFile in place of StrongHelp a t the
beginning of a help text. It takes a full filename path as a parameter.
For example,
TextFile DrWimpC:disthelp^Press F1 for help
would
load a file called disthelp stored in the main !DrWimpC application directory into a text file editor.
The 'Press F1 for help' text
would be still be sent to the interactive help application as usual.
If your window has a button type of NEVER you can still
operate a help button using the F1 key by setting the 'Hot Keys' flag of the window's template using a template editor. Then,
as long as another window having the input focus doesn't claim the F1 key press, it will be passed on to your window as before.
See
also, the 'External Help Buttons' section for details of hwo to add a help button to any window of a DrWimpC App Builder application
that responds to the F1 key or a mouse click - without requiring any code changes or recompilation of the application.
Keyboard shortcuts are key combinations associated with your application and maybe a specific window within it. DrWimpC App Builder
provides the following keyboard shortcut facilities for an application.
- A generic association with the application by means of a template file and template named as <appname>ibar and Ibar that acts as a 'Hot Key' window for the application. The shortcut handler is called when the key combination is received by the application.
- A window specific association. The shortcut handler is called when the window has the input focus and the application receives the key combination.
- A shortcut linked to a defined menu item. The keyboard shortcut key combination is matched to the shortcut key combination of a menu item and the menu item's handler called when the key combination is received either by the generic or specific window as\described above.
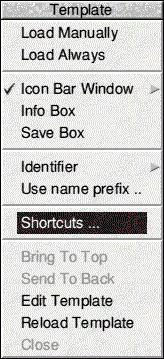
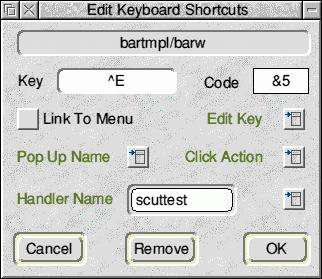
To add a key combination select the Key icon to make it writeable and then on the keyboard press the key combination. Its text and code will then appear in the Key and Code icons.
Select the Link To Menu option so that DrWimpC library will associate the key press with a menu item with matching shortcut key text defined for it. To edit or remove an existing key combination press <MENU> over the Edit Key button and select it from the menu list, make any changes and select the OK button, or to remove it select the Remove button.
.
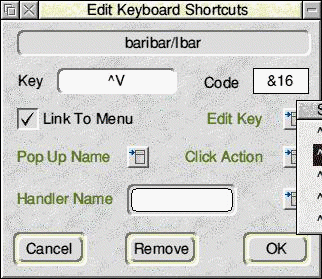
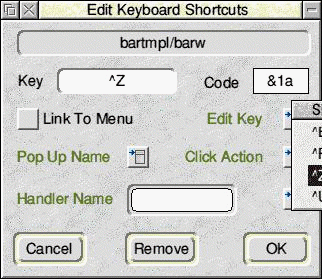


As for templates and menus you can link a template or menu to the shortcut so that when the key combination is received by your application
the menu or window is opened either as a popup or static dialogue.
The Pop Up Name button operates in the same way as the
Menu Name button of the Click Action window described above.
The Click Action button operates in the same way as the Click
Action button of the Click Action window described above.
The handler function is implemented as a template function. It is called when your application is notified of the
shortcut key press, so is of type keypress (so has suffix _kpr).. Since shortcuts are associated with a template, the function
is placed in the FormSrce C file for the Template File/Template.
There is no icon involved in the association, so no icon name.
This is what the Handler Name is for.
It is used as an icon name when naming the function. It allows each shortcut key to have its
own handler function. As such it should be unique and different from the name of any icon in the template definition (unless you want
the key press function of an icon to be called for the shortcut key).
Once you have given the handler a name the 'Key Press'
function menu is accessible by pressing <SELECT> over the Handler Name menu button as shown below.
Selecting the 'Key Press' menu item will open an external edit window for the template functions of the template File/Template you
are associating the shortcut with.
The edit cursor is placed at the start of the key press function body for the shortcut.
If the function does not exist then the external edit window is opened at the end of file with a default skeleton key press
function for the shortcut appended to the file.
The 'Key Press' menu item is ticked if a function exists for the shortcut
key press.

The usual source file menu is available by selecting <MENU> over the Handler Name menu button. Its operation is as
previously described for other Template Functions. Selecting its FN List ... item will open an external edit window for the template
functions , as usual.
Because the shortcut handler function is part of a template function source file it will be compiled into the corresponding template
function library and can be used in the same way as other template functions. So it can form part of a template object's
reusable functionality.
The !bar example application supplied in the DrWimpC Repository is a test program for this
and other template functionality. It has an example shortcut key press of CTRL+V which is associated with the bartmpl/barw window
(and the barobject) which is linked to the test menu Menu2, item 2.
When the barobject is placed in a window, the shortcuts
associated with the window are also included in the window containing the barobject when the application is loaded. See !bar2
in the examples application. (When the barobject is in Manual operation the Menu2 menu can be opened by pressing <MENU> over its
'nudgeup' icon). Selecting item 2 or giving the containing window the input focus and pressing <CTRL>+V will result
in a bar window being placed at the top left of the screen and the Info box window being opened as a static dialogue box . (Well it
is a test program so I wanted to see just what could be done).
Below is the !bar main window with the base barobject definition,
along with the !bar2 example main window with 4 barobjects (and two bar windows attached as panes), the third one in Manual mode with
its Menu2 menu open. Giving this window the input focus and pressing <CTRL>+V will cause a bar window to open at the top left
of the screen and the bar Info box to open lower down the screen,

