|
|
|
|
|
|
|
|
|
|
|
|
|
|
|
|
|
|
|
|
|
|
|
|
|
|
|
|
|
|
|
|
|
|
|
|
|
|
|
|
|
|
|
|
|
|
|
|
|
|
|
|
|

|
|
|
|
|
|
|
|
|
|
|
|
|
|
|
|
|
|
|
|
|
|
|
|
|
|
|
|
|
|
|
|
|
|
|
|
|
|
|

|
|
|
|
|
|
|
|
|
|
|
|
|
|
|
|
|
|
|
|
|
|
The DrWimp C Application Builder
|
|
|
|
|
|
|
|
|
|
|
|
|
|
|
|
|
|
|
|
|
|
Running the DrWimpC Program on the Raspberry Pi
|
|
|
|
Home
|
|
|
|
|
|
|
|
|
|
|
|
|
|
|
|
|
|
|
|
|
|
|
!DrWimpC and its associated programs and libraries have been tested on the Raspberry Pi.
Some updates were made to !DrWimpC version 1.14 to tighten up the checks on system variable existence and the file paths they represent. In some circumstances messages referring to SCSI system variables not being set were displayed if a path name variable such as DrWimpC: or bar: did not exist when the !DrWimpC program or DrWimpC library checked for the existence of, or attempted to run files or applications using the path variables in the file or application path names. (Note that this occurs when booting and running RISC OS from an external usb drive and not from the SD card). This seems to be because of differences in the RUN$PATH system variable on the Raspberry Pi version of RISC OS - e.g. it contains a zero length path in its list of path names. The changes to DrWimpC Application builder mean that all variables are checked that they exist before they are used instead of making some assumptions that they should exist.
|
|
|

|
|
|
|
|
|
|
|
|
|
|
|
|
|
|
|
|
|
|
|
A large part of !DrWimpC is compiling the programs you write using !DrWimpC. This can be a time consuming process, especially on a low power system as the Raspberry Pi. I would suggest that for any serious compilation work whether the compiler is invoked from !DrWimpC or your own make files and projects, that running the compilers, and loading library header files from the ram filing system is a way to significantly improve the compilation times.
While the benefits will be comparatively smaller when compiling large C files, the compilation times for small files is considerably reduced. This helps !DrWimpC projects which can typically have small C files containing only or many default function definitions and header file include statements relevant to the functionality of the defined user functions. Note that the generated default user files contain header file include statements for the DrWimpC library header files likely to be used in the user functions defined in the file. You can stream line the header file includes for your DrWimpC projects by editing the default C user files in !DRWDEF.c to change or deleting any include statements you don't require in your projects. Only the DRW/drwwh.h, DRW/drwWwinit.h and DRW/drwWxdata.h are required in each file, along with those DrWimpC library header files sufficient to compile the default user files.
|
|
|
|
|
|
|
|
|
|
|
|
|
|
|
|
|
|
|
|
A Development Setup for !DrWimpC on the Raspberry Pi
|
|
|
|
|
|
|
|
|
|
|
|
|
|
|
|
|
|
|
As this is only a suggested setup I may as well describe my own setup that I use on both the Raspberry Pi and Virtual-RPC AdjustSA. It does mean a copy process into a RAM disc of sufficient size that if done on booting the system will significantly increase the boot time of the Raspberry Pi. However, the compilation times are definitely improved. You can always choose to manually copy the compilers and C libraries into the RAM disc as and when you want to use them from !DrWimpC. Its all straightforward copying of files and optonally, a little bit of resource rearranging.
|
|
|
|
|
|
|
|
|
|
|
|
|
|
|
|
|
|
|
Obviously, the hardware I'm using will also make a contribution to the speed of operation, and also may be of general interest, so I'll briefly mention both of them.
1. Raspberry Pi model B 512Mbytes ram (bought from Farnell.com in December 2012).
2. Virtual-RPC AdjustSA 256Mbytes ram in a Windows 8 32-bit installation with 4GB ram intel i2120 CPU @ 3.30. GHz, intel integrated graphics.
Both systems are connected to a 19" Samsung Synchmaster 940N VGA monitor (@ 1280 x 1024 resolution) through a 4 port MyHopper PS/2 kvm switch (bought from Stuart Tyrell Developments in 2008). I use an HDfuryPro dual HDMI input HDMI to VGA converter (I know its a cheap clone of the real thing but it is mentioned on the elinux.org/RPi_VerifiedPeripherals site as one that works with the Pi and it does 1280 x 1024) to connect the Raspberry Pi to the kvm switch. Keyboard and optical mouse are usb and are connected to the kvm switch using keyboard and mouse extension leads and usb to PS/2 adapters. The Raspberry Pi is connected to the kvm switch using a usb to PS/2 converter bought from CJE Micros that I also used for my Iyonix.
The Raspberry Pi config.txt has the following settings to get it to work with the HDFuryPro HDMI to VGA converter:
hdmi_drive=2
hdmi_group=2
hdmi_mode=36
disable_overscan=1
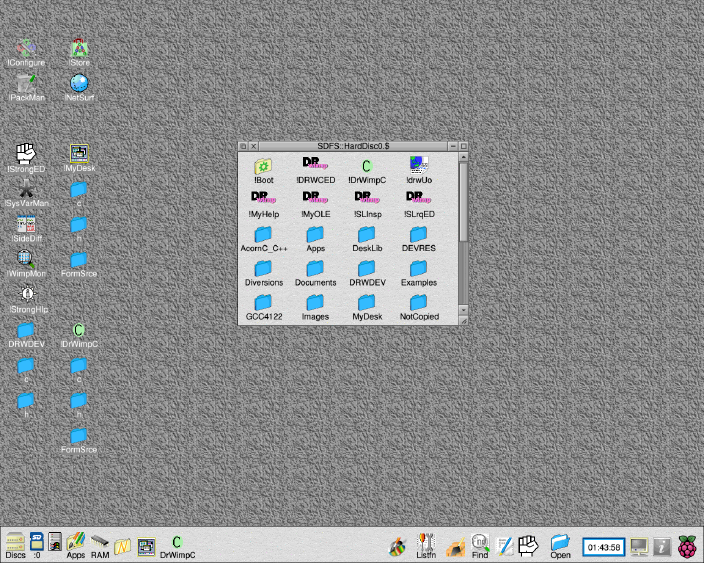
The Raspberry Pi is booted into RISC OS loaded from a Samsung 32GB Class 10 UHS-1 micro SD card. My initial desktop looks like this -
|
|
|
|
|
|
|
|
|
|
|
|
|
|
|
|
|
|
|
|
|
|
|
|
|
|
|
|
Copying the Compiler Tools and C Libraries to RAM
|
|
|
|
|
|
|
|
|
|
|
|
|
|
To accommodate the tools I create a RAM disc of 128 Mbytes using the Discs configure tool so that the disc is available during system boot.
|
|
|
|
|
|
|
|
|
|
|
|
|
|
|
|
|
From the snapshot above you can see that I have installed the Acorn C/C++ tools and GCC 4.1.2.2 C tools into top level directories of the Boot drive. The Acorn C installation is a full copy of the ROOL DDE from the NutPi SD card.The GCC4122 directory contains both a full installation of the GCC compiler and tools along with a directory containing only those parts that I want to copy into the RAM disc. In this case that amounts to everything except the docs folder.
|
|
|
|
|
|
|
|
|
|
|
|
|
|
|
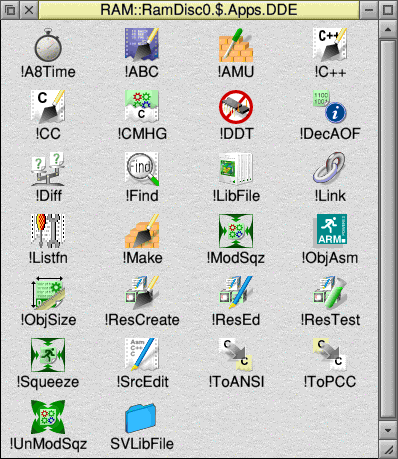
I only require the use of the Clib header files and library from the Acorn C/C++ installation, !SetLibPaths and the DDE tools. I copy the DDE tools seperately into the RAM disc in folder RamDisc0.$.Apps.DDE and point DDE$PATH to that directory.
|
|
|
|
|
|
|
|
|
|
|
|
|
|
|
Similarly for OSlib I only require the header files, so I have an OSlib directory that contains only the OSlib h and Hdr directories (in the oslib sub directory) and the SetVars file that gets copied to the RAM disc, along with an OSlibF directory that contains the full OSlib 7.00 distribution. Your requirements may differ and you can copy other elements of the full OSlib distribution such as libOSlib32/a, the o directory, etc, to the RAM disc. There are many ways to do the copy and arrange how you store the originals on disc. This one works for me. One small point to note is that use of the GCC compiler tools will require the GNU make tool 3.81. I had some trouble in getting make seen by the system in the normal place of !GCC.bin in the RAM disc copy when doing a GCC compile from !DrWimpC. I had to resort to placing a copy of the GNU make utility in Boot:Library which on my system is in the directory SCSI::HardDisc4.$.!Boot.Library. (And the same for the mkdir utility). Probably something to do with RUN$PATH.
|
|
|
|
|
|
|
|
|
|
|
|
|
|
|
|
|
|
The copy operations are done using an obey file. Since I do the copy during system boot I place the obey file in the Boot:Choices.Boot.Tasks directory and name the file with a preceding tilda character so that the file will be one of the last things run, assuming a normal name ordering of the directory.
The Hon and Hoff commands switch the hourglass on/off.
|
|
|
|
|
|
|
|
|
|
|
|
|
|
|
|
|
|
Hon
SET CyDevToolsToRam$DIR <Boot$Dir>.^
SET CyDevToolsToRam$Path <CyDevToolsToRam$Dir>.
CDir Ram::RamDisc0.$.AcornC_C++
Copy CyDevToolsToRam:AcornC_C++.!SetPaths Ram::RamDisc0.$.AcornC_C++.!SetPaths ~C~VQR
CDir Ram::RamDisc0.$.AcornC_C++.Libraries
Copy CyDevToolsToRam:AcornC_C++.Libraries.Clib Ram::RamDisc0.$.AcornC_C++.Libraries.Clib ~C~VQR
CDir Ram::RamDisc0.$.Apps
Copy CyDevToolsToRam:Apps.DDE Ram::RamDisc0.$.Apps.DDE ~C~VQR
Copy CyDevToolsToRam:GCC4122.GCC4122R.!GCC Ram::RamDisc0.$.!GCC ~C~VQR
Copy CyDevToolsToRam:OSLib Ram::RamDisc0.$.OSlib ~C~VQR
Hoff
Run Ram::RamDisc0.$.AcornC_C++.!SetPaths
Run Ram::RamDisc0.$.OSlib.SetVars
Run Ram::RamDisc0.$.!GCC
|
|
|
|
|
|
|
|
|
|
|
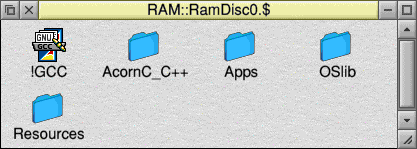
The run commands at the end ensure that the GCC, OSlib and Acorn C/C++ system variables point to the tools in the RAM disc. The resulting RAM disc structuire should look like this (without the Resources directory) -
|
|
|
|
|
|
|
|
|
|
|
|
|
|
|
|
|
|
|
|
|
|
|
|
|
|
|
|
|
|
|
|
|
|
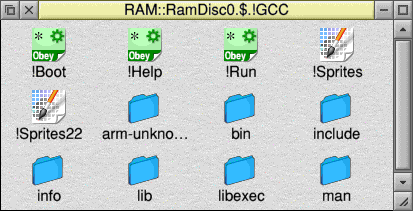
RAM::RamDisc0.$.!GCC should look like this -
|
|
|
|
|
|
|
|
|
|
|
|
|
|
|
|
|
|
|
|
|
|
|
|
|
|
|
|
|
|
|
|
RAM::RamDisc0.$.AcornC_C++ should look like this -
|
|
|
|
|
|
|
|
|
|
|
|
|
|
|
|
|
|
|
|
|
|
|
|
|

|
|
|
|
|
|
|
|
|
|
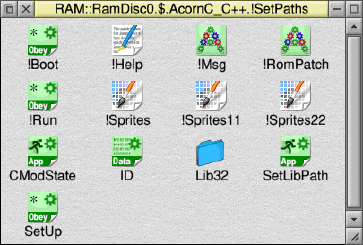
RAM::RamDisc0.$.AcornC_C++.!SetPaths should look like this -
|
|
|
|
|
|
|
|
|
|
|
|
|
RAM::RamDisc0.$.AcornC_C++.Libraries should look like this -
|
|
|
|
|
|
|
|
|
|
|
|
|
|
|
|
|
|
|
|

|
|
|
|
|
|
|
|
|
|
|
|
|
|
The RAM::RamDisc0.$.Apps directory just contains a sub directory DDS, which containd the Acorn C/C++ Tools and should look something like this -
|
|
|
|
|
|
|
|
|
|
|
|
|
|
|
|
|
|
|
|
|
|
The RAM::RamDisc0.$.OSlib directory just contains the OSlib header files in sub directory oslib, and the SetVars file and should look like this -
|
|
|
|
|
|
|
|
|
|

|
|
|
|
|
|
|
|
|
|
|
Of course, each Raspberry Pi setup will be tailored to individual requirements and the copy commands need to be adjusted to suit them.. I have found the setup I describe gives a significant performance boost on my Raspberry Pi when using !DrWimpC. The cost is a somewhat longer boot time due to the copy operations.
|
|
|
|
|
|
|
|
|
|
|
|
|
|
In addition I have experimented with moving both the DrWimpC library compile and run time components and the GCC 4 !SharedLibs that support ELF and shared library loading into the RAM disc. That may also provides further performance benefitd. Certainly, placing the DrWimpC library stuff into the RAM disc seems to help. I describe that copy process in the next topic.
|
|
|
|
|
|
|
|
|
|
|
|
|
Next: Copying the DrWimpC and GCC Resources to the RAM disc
|
|
|
|
|
|
|
|
|
|
|
|
|
|
|
|
Previous: Program Written Using DrWimpC Application Builder
|


